
Isn’t it funny how our perception of difficulty can be affected? I mean, a loaf of bread is ridiculously easy to make, albeit slightly time-consuming. Yet we all think that even a loaf of super basic white bread is beyond reach.
This post may contain affiliate links. If you click a link and make a purchase, I may receive a small commission at no extra cost to you.
This post comes to you from my Weebly archives. I recently dug it up as part of the effort to migrate my content. But given the unfortunate similarities of my husband’s situation at the time and my situation when I baked a loaf to update pictures last month, I’ll be sharing the original post in addition to new content.
Archive: March 3, 2016
It has been a heck of a time since the last post. We hit the road, leaving Texas behind, and heading to Indiana to stay with [my husband]’s parents until we find an apartment.
We left during Snow Storm Pandora. Luckily, the roads weren’t so bad for us, but they were nightmarish everywhere else, and we had the family worried.
Our last day on the road, we received the bad news that my husband’s grandmother had passed on. Needless to say, it’s been a long week. He hasn’t been talking much.
The Hilarity of Failed Bakes
I got [him] to laugh today, though, when I messed up the banana bread recipe I was going to use for this. Well, I apparently wasn’t reading the recipe carefully, and I just poured ALL the batter into an 8 x 8 cake pan.
By the way, the recipe says to use two large bread pans. 15 minutes later I started smelling fully baked banana bread and went to check on it. It had exploded over the cake pan and was cooking on the bottom of the oven.
WEEEEE! So, after laughing hysterically at me, [Hubs] helped me clean out the oven and move half of the batter over to another pan. I guess we’ll see how this goes. It’s still in the oven. Fortunately, the smoky burning smell is being replaced by the perfume of properly baking banana bread.
Back-Up Plan: Super Basic White Bread
Since I was really in a mood for baking today, there is a ball of white bread dough also rising on the counter. One of my favorite things to bake is super basic white bread.
The recipe couldn’t be any simpler, and you don’t need any machinery to work it together. For me, it’s a great way to relieve stress, and nothing makes a better sandwich!
Nurture Your Culture
For starters, I keep things warm throughout the process. I start with a cup of clean filtered water and microwave it for thirty seconds. It should be roughly body temperature. Then I stir in the sugar to dissolve before I put in the yeast.
Yeast LOVES sugar and warmth. It bubbles up all frothy and foamy. On the other hand though, salt is not yeast’s friend. So, it’s important to mix the salt into the flour properly before introducing the yeasty water.
Once the ingredients are all mixed up and friendly in a tight ball, I place it in a clean, greased bowl. But then, I microwave a tea towel for thirty seconds and lay it over the bowl to keep the dough warm. This lets the little yeasties feeding on the sugars create yummy gluten strands.
Disclaimer: Almost everything I know about the formation of glutens and the behavior of yeast, I learned from various episodes of Alton Brown’s Good Eats.
Go Your Own Way
The best part of this recipe is that there are endless variations. Sub in [cooled] melted butter, coconut oil, vegetable oil, or shortening for the olive oil for a slightly different taste and texture.
Use honey or brown sugar in place of the white sugar, too. One of my favorite variations was honey and coconut oil with an egg wash to make it golden and shiny. Mmmmm! But for today, I’m using good, old, white sugar and olive oil because it’s on hand.

Re-Testing Day: January 30, 2020
I mentioned there were some odd similarities, so let me explain.
In 2014, my husband was laid off just before his birthday in September. We decided to leave LA and move in with my parents for three months. There, we could save up money and move to Indiana, where he would go to graduate school. His grandmother passed away while we were on the road from Texas to Indiana.
Flash forward to this year. I was laid off the day before I turned 30. We’ve been able to stay in our own home, but things have still been chaotic around here. The budget got really tight, and we had to call in my parents to help us out with daycare.
Then, my grandmother passed away this year on January 19. Now, admittedly, she and I weren’t as close as my husband and his grandmother, but her passing still left me brokenhearted and depressed.
For some reason, my response was to make a batch of banana bread and a loaf of white bread. This time, it wasn’t on the same day.
Sometimes You Just Need Bread
In this case, the reason I needed to bake banana bread was that we had a funeral to attend out of state, and we had bananas about to go bad. The obvious solution was to make muffins and bring them with us.
In case you’re curious, my perfect banana bread recipe yielded 11 muffins. We ended up only having three left to bring on the road. And let’s be real, they’re naked cupcakes more than they are muffins… so good.
Baking Bread to Beat the Blues
But the real secret of baking bread to beat the blues is in the white bread recipe. As you knead the dough by hand, a state of meditation comes over you. It’s a slightly tough and monotonous task that requires forearm endurance and the ability to send your mind elsewhere.
You can knead out the guilt you feel from not taking pictures the one time your baby met her great-grandmother. Think about all the times your grandmother took you shopping for new clothes, and how she hemmed your new jeans so they’d be the right length.
Knead and remember her stitching up the hole in your favorite stuffed bunny, and fixing the torn edging on the blanket you slept with every night until middle school.
Honestly, I worked through a lot of feelings and prayed a ton while I was kneading the dough for this loaf of bread.

The Real Secret of Super Basic White Bread
Even if you’re not working through something while you make this dough, the secret is in kneading it completely. The first round is just to get the ingredients mixed together, and you shouldn’t be kneading for longer than 5 minutes by hand.
Once you’ve let it rest and rise for 2 hours, it’ll be soft and pliable but not elastic. This second round of kneading is where the gluten will be worked properly. The amount of time required to knead at this point is irrelevant. It may take you longer or it may take you less time compared to what it takes me.
What you’re really looking for is a dough that bounces back when you press a finger into the surface. When you stretch a section out, you should be able to stretch it thin enough that you can see light through it (this is called the “windowpane test”).
The Second Proof
At this point, you’ll be tucking it up into a loaf form to proof for the second time in its pan. To do this, press it and stretch it out until it’s a rough rectangle. Fold the ends of the short sides in. This should make your dough as wide as the bread pan is long.
Now, start on one end, tightly tuck and roll the dough (like a jellyroll). Place your log into the bread pan with the seam side down, and cover for a second rise.
Alternate Option: Braiding Your Loaf
The other option is a braid, or plait (if you watch too much Bake Off). Divide the dough into the three. Roll each section out until it’s about 6 inches longer than the pan.
To start, overlap all three pieces at one end. Lightly press them together. Then, braid your bread by crossing first the left section to the center, then the right to the center.
Continue this process until you have reached the end. Tuck the ends under the dough loaf on both sides. Place the loaf into the pan with tucked ends facing the bottom.
The second proof should take 1 hour, but it may take an extra 30 minutes. The goal is for it to double in size before it goes into the oven.
How to Know if Your Bread is Thoroughly Baked
Viewers of the Great British Baking Show, or Bake Off as we lovingly refer to it, live in fear of two things: soggy-bottomed tarts and underbaked bread. You envision Paul Hollywood striding into your kitchen, jamming a finger into the center of your loaf, and declaring it’s no good.
So, how can you tell if it’s done?
The first thing is to pop it out of the pan and tap the bottom. It should sound hollow. I’ve tried this by tapping the top, and it works as well. However, removing it from the pan brings us to the second way to tell if your bread is done.
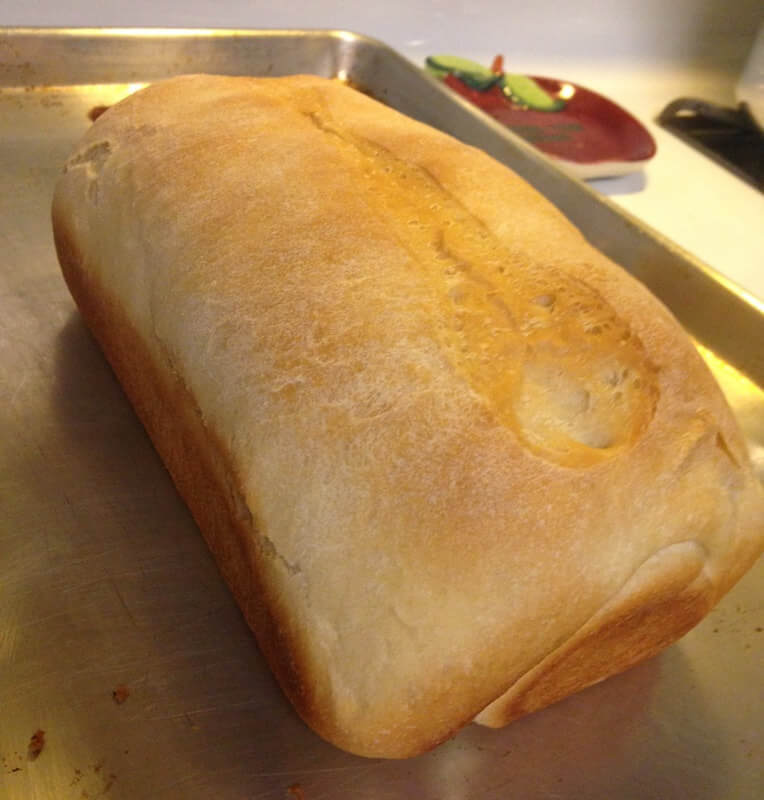
With the loaf removed from the pan, you can visually assess whether it’s achieved a golden brown hue all the way around. Just because it’s deliciously toasted on top, does not mean it is on the bottom.
The third way to check is one I avoid unless I’m making brown bread rolls, which don’t change color. This is to insert a thermometer and check the internal temperature. It should be 190ºF if it is properly done.

Slicing Into This Super Basic White Bread
I have definitely made enough loaves of white bread to know that the first slice, warm and fresh from the oven, is like coming out of the bath to a newly laundered towel. Who doesn’t love that?
But, for a loaf of bread that is intended for sandwich-making throughout the week, it needs to cool. I don’t just mean cool compared to the oven. I mean completely cooled off and room temperature. And there’s a trick to this.
You’ll have removed the loaf from its pan to check its doneness already. Do not put the bread back into the pan. Instead, place the bare loaf onto a wire cooling rack to let airflow around it.
If you let your bread cool in the pan, it will get soggy. Paul Hollywood, Mary Berry, and Prue Leith will apparate into your kitchen (yes, I just crossed Bake Off and Harry Potter references) and berate you.
What Else Do You (K)Need to Bake Bread?
There’s not much else to it. I’d recommend you invest in a nice loaf pan if you don’t have one already. I have a glass one that I love, and a nonstick that’s done a great job for many years.
Other than that, there’s not much left to tell you but to get baking. Whether you need to work out some feelings, or you just really want some fresh bread, this is a great loaf to add to your recipe box.
Let me know in the comments if you’ve tried this recipe for Super Basic White Bread. I also want to hear what recipe you go to when you need to vent. And don’t forget to subscribe to get the latest updates.

Super Basic White Bread
Equipment
- Loaf Pan
- Wire Cooling Rack
- Large mixing bowl
Ingredients
- 1 cup filtered water
- 1 package active dried yeast
- 3 tbsp sugar
- ¼ cup olive oil
- 4 cups all purpose flour
- 1 tsp salt
Instructions
- Measure 1 cup of clean filtered water into a glass measuring cup. Microwave for 30 seconds. Stir the water with a clean finger to make sure the water is roughly body temperature. A little warmer is fine.
- Stir in the sugar until dissolved, and then sprinkle in the yeast. Let it sit for at least 5 minutes. It will develop a foamy head like a freshly poured beer.
- Wash up your hands and remove your rings.
- Then, mix up your flour and salt. Add in the oil and the yeasty water. Start mixing a little with a spatula until it becomes too sticky and hard to stir. Then start mashing it with your hand. I use one hand to hold the bowl and the other to make sure all the flour gets fully incorporated. Once it has formed a ball, pick it up and turn the sides into the bottom until the top seems to form a tight skin.
- Place the ball into an oiled bowl. Microwave a clean tea towel for 30 seconds, and lay it over the top.
- Let your bread rise for 2 hours.
- Punch it down and turn it out onto a floured counter. Knead it until it passes the "windowpane test" and then form it into a loaf either by tucking and rolling or braiding.
- Place the loaf into an oiled loaf pan. Brush with oil. Cover with a warm tea towel, and let it rise for 1 hour.
- Preheat the oven to 375° F.
- Bake your loaf for 30 minutes.
- Turn it out onto a cooling rack to keep it from getting mushy. Cool completely before cutting.
- Store in an airtight container or resealable bag. It'll last for a week.


Who doesn’t love fresh out of the oven-baked bread? Yum! Thanks for sharing.