My PeaPa used to say, “I only like two kinds of pie: hot and cold.” And he was right! There’s nothing wrong with any kind of pie, except one… mushy pie. The best thing about a hand pie is that you can eat it cold or warm it up, but the crust on your leftovers doesn’t get soggy!
Disclaimer: This post may contain affiliate links. If you click on a link and make a purchase, I will receive a commission at no extra cost to you.
My husband loves pie, but he loves hand pies even more. There’s something fun about being able to hold a slice of pie in each hand like a cartoon character. More than that, he loves this pie crust. It’s so yummy that the higher crust to filling ratio doesn’t even matter. With hand pies, it really is all about the crust.
A Great Pie Crust is Key
I use an all-butter crust recipe because I prefer using simple ingredients, and I get a pretty good result without shortening. Here are some of my favorite crust making tips.
Freeze and Grate Your Butter
My trick for getting the butter to produce a flaky crust is keeping it ice cold. I freeze the stick completely, and use the larger side of a box grater to shred my frozen butter.
Simply tossing the butter in the dry ingredients produces the “pea-sized” texture that you look for when cutting-in. With less time to warm up, the butter retains its frosty temperature.
Water Works Best, but Bourbon is Good, Too
Then, I have used water for this recipe. In the past, I have used ice cold bourbon, vodka, vinegar, and water. Vodka and vinegar didn’t do anything for me. Bourbon is AMAZING.
It helps with the flakiness and it adds a fun extra flavor. But for our hand pies, we want something basic that will fit any filling. So, this time, we’ll use water.
Do Not Over Mix Your Pie Crust Dough
The last thing that ensures you’ll get a great crust is how you mix it. You want to drizzle in the water a little at a time, using your fork to distribute moisture. Once you start to see the dough forming, dump it onto the counter.
It will likely still look very dry. Keep the ice water nearby. Working with a bench scraper you’ll dig under the dough and fold it. Turn the mass 90-degrees, and fold it again.
You’ll continue doing this until your dough smooths out and you can tell layers are forming. Usually, this is because you’ll fold, and the side will crack, exposing flaky layers.
At this point, you should still have a cold dough that is fully incorporated and kind of smooth looking. Wrap it in plastic and put it in the fridge to rest for 1 hour.
Why Do You Rest Pie Dough in the Fridge?
The reason you need to rest the pie dough in the fridge is two-fold. First, you want to make sure your dough is super cold before it goes into the oven. Cold pie dough makes for flaky pie crust.
The second reason is that your dry ingredients are not fully hydrated just after mixing. They need a little time to get to know your water and butter. Once they soak up some liquid, they’ll form a better gluten layer. This makes the pastry layers between the butter layers more structured.
Structure sounds odd, but within the layers, it keeps your dough from being stodgy and hard.

More Reasons to Love Hand Pies
Now, let’s be honest: just because it’s homemade, that doesn’t make it healthy. But it does mean I have more control over the sugar, and I know it’s not filled with artificial colors or other weird things that aren’t real fruit.
The other great thing is that you can do whatever flavor you want! Now, honestly, cherry, peach, and apple pies are our favorites, we could totally do this with any flavor imaginable.
How Do You Pick a Flavor?
Well, let me help you out with picking a flavor. Remember back when I posted about that Amaretto-Cherry Pie Filling and you were like, “That’s great, but where’s the crust?”
The original version of that post involved turning that pie filling into hand pies, a cheesecake, and a really good ice cream sundae. At the time, it seemed like too much fun for one post. But you know what? It created an opportunity to branch out.
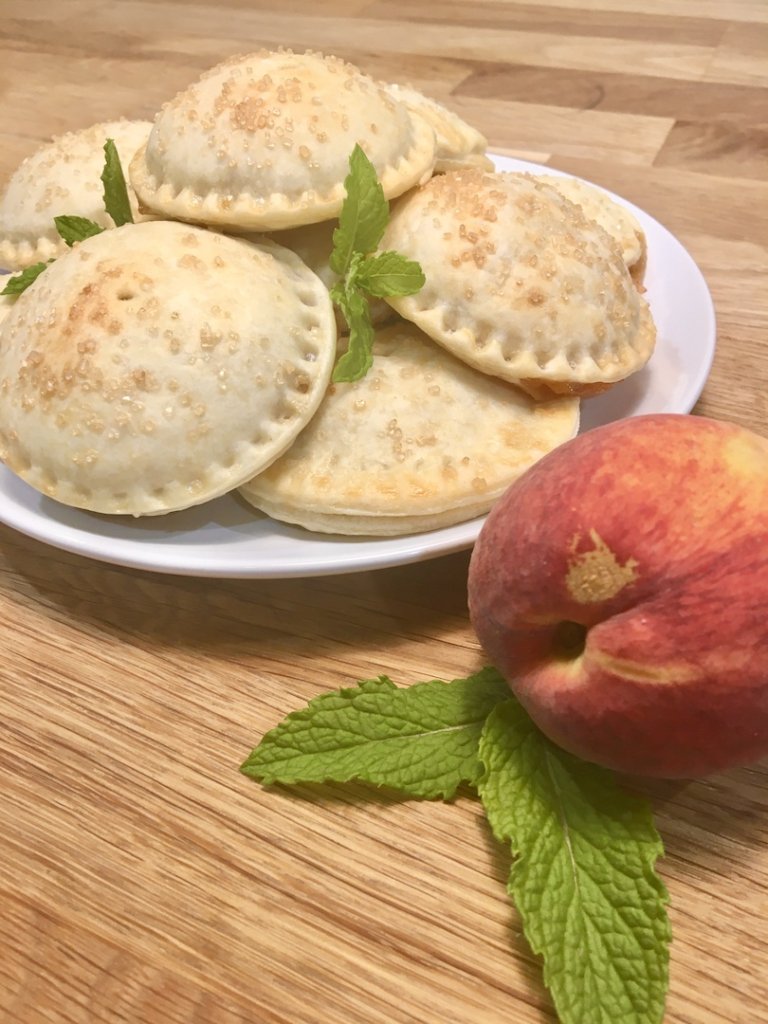
This time, I used the pie filling from my Southern Peach Pie recipe! And next time, I’ll be using the filling for Apple Crumble Pie.
And if you don’t feel like making your own pie filling, you can pick up a can from the store. It will work just fine! You could even use fruit preserves.
Do You Need to Do Anything Special to the Pie Filling?
With the Amaretto-Cherry Pie Filling, or with canned filling or jarred preserves, you can use them right out of the can/jar. With a homemade pie filling that usually cooks down in the oven, you need to do a tiny bit more work.
With apples and peaches, in particular, you need to cut your fruit into much smaller pieces. Think about the size diced peaches are in fruit cups.
The second thing you need to do is cook down the liquid with a bit of thickener. For my Southern Peach Pie filling, I made up my filling in a sauce pan and brought it to a simmer to reduce the liquid by half. Then, I collected about 2 Tbsp of liquid and stirred in 1 tsp cornstarch. I mixed that slurry back into the filling.
Once the filling was very thick, I poured it into a Pyrex bowl with a lid and refrigerated it until it was cold. Remember, you want your pie dough to stay cold, so you also want to keep your filling cold, too. This way, your crust maintains its integrity.
Are There Any Cool Tools to Use for Hand Pies?
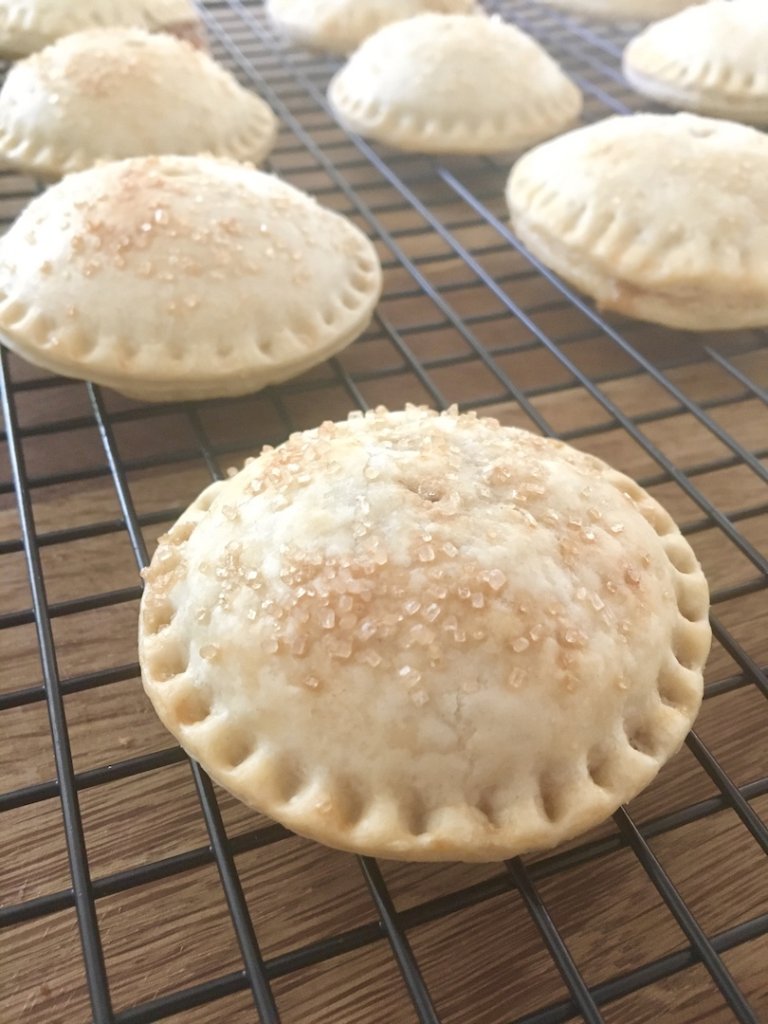
You’ll notice that on my cherry pies, they’re a little more rustic. I simply crimped the edges with a fork. This method is easy and accessible. On my peach pies, though, I used an old Pampered Chef ravioli press that my mother-in-law gave us.
I looked for a good alternative, and the next best thing is this 3-inch ravioli stamp. You may still want to use a 3-inch biscuit cutter to get your pie crust cut out. Then, you’ll place a heaping tablespoon of filling in the center of the bottom crust, brush the edges with egg, and lay the top crust on top. Line up your ravioli stamp and press down for a pretty crimped edge!
I’ve already mentioned that a good bench scraper is super important and I definitely recommend that you use one in your crust making to avoid heating up the dough with your hands. This is the one I like best.
How Do You Serve Hand Pies?
There’s one last very important question to answer. How do you serve these happy, little hand pies up? Well, I recommend letting them cool first. This it just to avoid burning the roof of your mouth on the molten filling.
But, they are wonderful warm! Scoop up a bit of vanilla ice cream, too, and enjoy! I also like them room temperature with a glass of milk or a cup of coffee. The best thing about hand pies is that you don’t need a plate or a fork. So, you can enjoy them snuggled up on the couch during a good movie. or huddled under your mom’s desk because there’s thunder.
So, whether you’re making these for a picnic or a rainy night in, you can enjoy your hand pies however you want.
Comment below and talk to me about your favorite pie fillings! What are you putting in your hand pies? And don’t forget to subscribe to get a free meal planning worksheet and weekly blog updates!

Flaky, Butter Crust for Hand Pies
Ingredients
Pie Crust
- 1 stick unsalted butter frozen, grated on the large side
- 1½ cup all purpose flour
- 1 tsp salt
- ¼ cup sugar
- ½ cup ice water
Hand Pies
- 1 1/4 cup pie filling of choice
- 2 Tbsp egg whites
- 2 Tbsp turbinado sugar
Instructions
Pie Crust
- Whisk together the flour, salt, and sugar with a fork.
- Shred in the frozen butter and lightly toss in your dry mix to coat.
- Add in the water (not the ice) starting with 1/4 cup. Still using your fork, stir to distribute moisture. Once you can convince a somewhat dry clump to stick together, dump the bowl out onto the counter.
- Using a bench scraper, fold the crumbly mixture over onto itself until it is smooth and hydrated. Work quickly so it stays ice cold. If your dough gets warm, put it in the fridge for 10 minutes before continuing to fold it to shape.
- Once you've achieved a mostly smooth surface (but the sides where you've folded may have cracked and show flaky layers), wrap in plastic wrap or beeswax food cloth. Rest in the fridge for 1 hour.
Hand Pies
- Preheat oven to 375°F.
- Roll out the pie dough to ⅛ inch thick. Use a 4-biscuit cutter to cut out 20 circles. You may need to collect the scraps and reroll them. To do this, stack the scrapes and roll. Do NOT squish them like PlayDoh or you'll lose the layers. Place the circles on a parchment-covered baking sheet.
- Spoon 1½ Tbsp of the pie filling into the center of 10 of your circles.
- Brush the edges with egg whites, and then cover with the other 10 circles of pie crust.
- Use your fingers to press the top crust down onto the bottom crust. Crimp the edges with the fork.
- Brush more egg white all over the tops of the pies. Sprinkle on turbinado sugar.
- Use a paring knife to poke a small vent hole in the top.
- Bake for 25 minutes, or until golden brown.
- Cool completely before serving.
- Makes 10 pies.